How to Make AI Images Print-Ready: File Types, Resolution, Export Settings, and Quality Checks
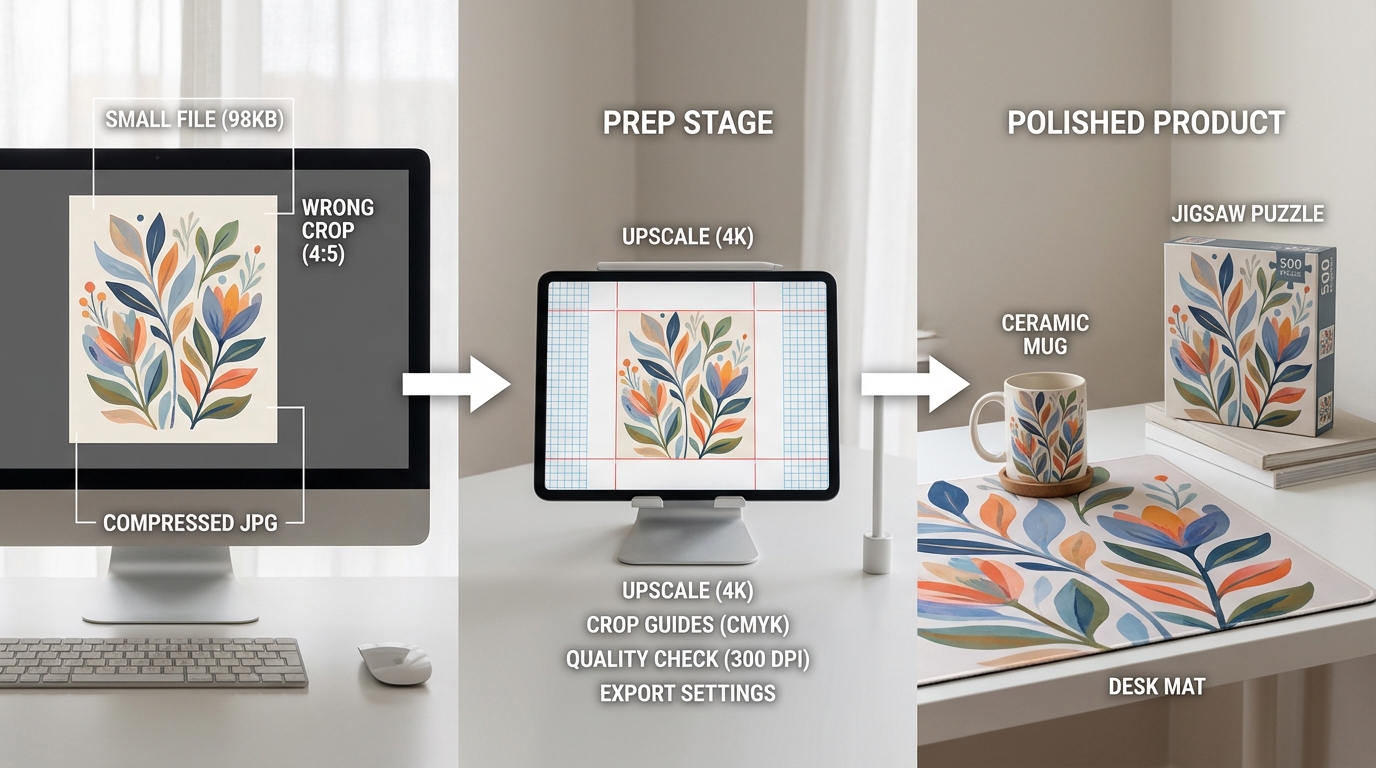
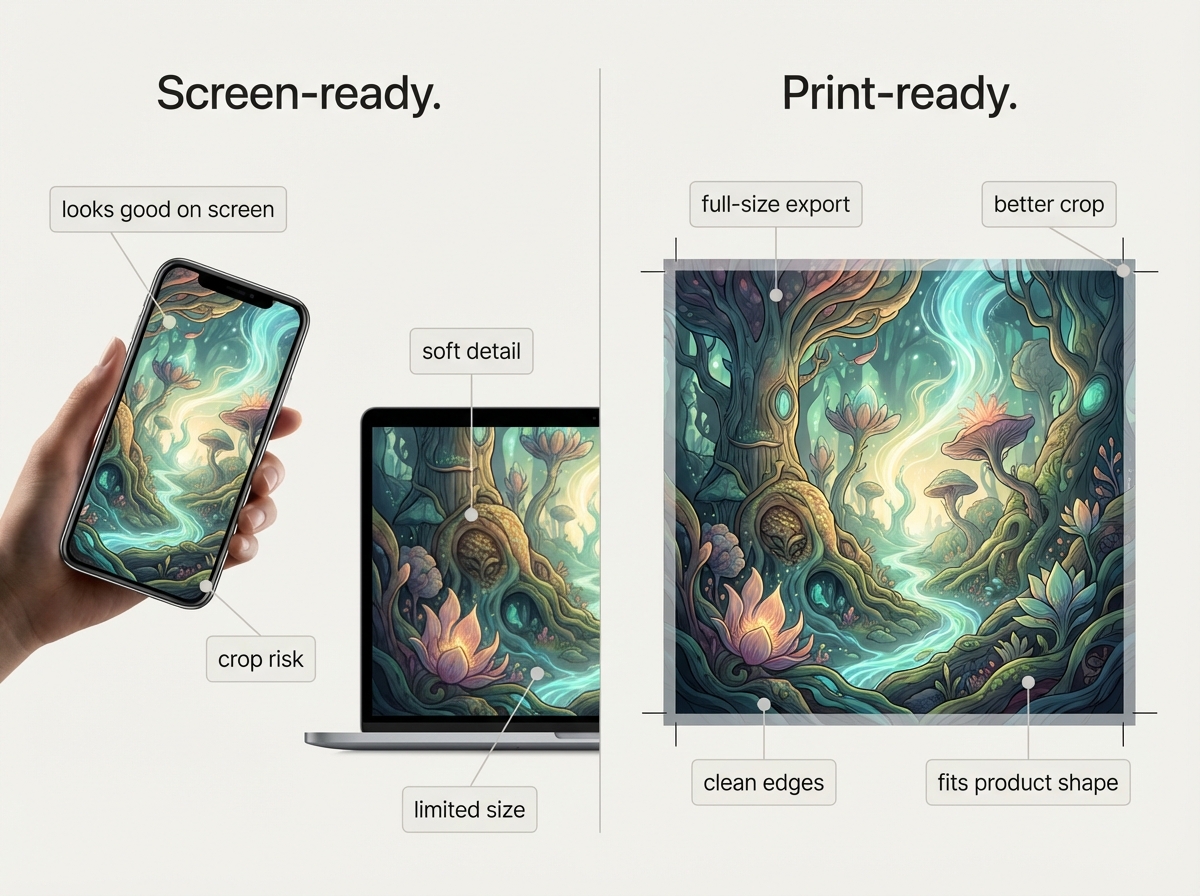
If you want to print an AI-generated image, the goal is not just to have a file that looks good on your screen. The goal is to have a file that still looks sharp, clean, and intentional when it becomes a physical product.
The good news is that many AI images can be prepared for print, even if the original file is not perfect. A source image that is a bit small, slightly soft, or exported in the wrong format is not automatically unusable.
This guide walks through the practical workflow: file types, sizing, resolution, export settings, visual quality checks, and a simple checklist before upload.
What “print-ready” means in plain English
A print-ready AI image is a file that suits the product and size you want to print. In practical terms, that usually means the image has enough pixel dimensions for the final print area, the file type is suitable for the artwork, the crop fits the product shape, and important details are not obviously soft, distorted, noisy, or cut off.
Print-ready does not mean flawless. A file can still be workable if it needs light cleanup, resizing, or upscaling. The real question is whether the image can be prepared well enough for the product you want.
Step 1: Choose the best file type for printing AI images
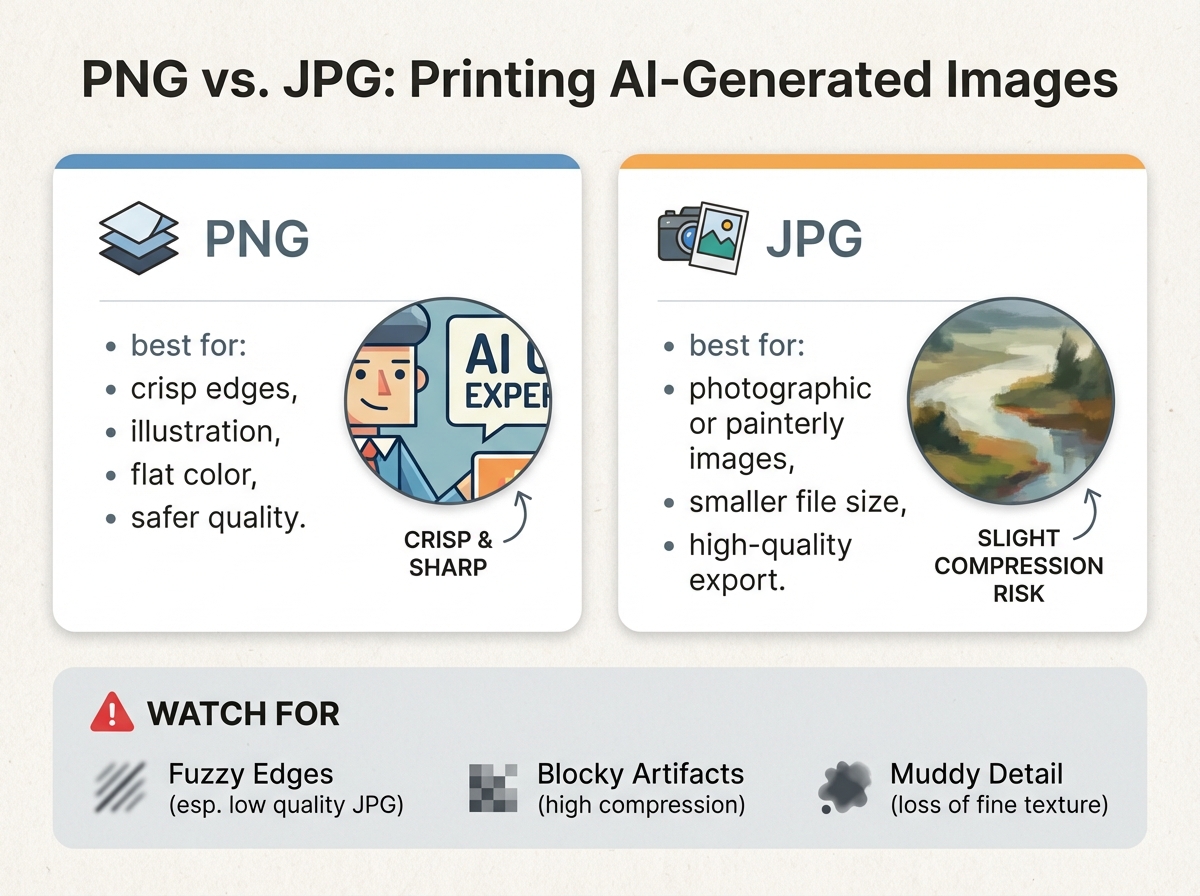
PNG is usually safer when:
- the image has crisp edges or graphic details
- you want to avoid extra compression
- the artwork includes line work, flat color areas, or clean illustration
- the image is more photographic or painterly
- you need a smaller file size
- the export is high quality and visibly clean
Rule of thumb: choose PNG if you want the safest general-purpose option. Choose JPG only if the file is high quality and not showing compression damage.
If you are specifically working with ChatGPT image files, see How to Print ChatGPT Images Without Losing Quality.
Step 2: Match pixel dimensions to the print size
One of the most common mistakes is assuming a file that looks large on a phone or laptop is automatically large enough for print. Print quality depends on the relationship between image width and height in pixels, intended print size, and how much visible detail the product needs.
- Mugs are usually more forgiving.
- Desk mats need a wider composition and more detail across the frame.
- Puzzles benefit from enough clarity that the image does not look muddy when broken into pieces.
If you want the deeper explanation of size, DPI, PPI, and upscaling, read AI Image Resolution 101: DPI, PPI, Upscaling Explained for Perfect Prints.
Step 3: Understand DPI vs PPI without overcomplicating it
PPI means pixels per inch. It describes how much image data you have for a given print size. DPI means dots per inch and relates more directly to printer output. For most people, the practical question is simpler: does the image have enough real detail for the size you want to print?
Step 4: Use the right export settings for print
A clean export gives you a better starting file. Export at the largest available original size whenever possible, avoid repeated saves that add more compression, keep the file as PNG if you want maximum detail, and if you use JPG, export at high quality.
- Is the image cropped correctly?
- Are the most important details safely inside the frame?
- Are there blank margins or unwanted background areas?
- Did the export reduce quality compared with the original?
Step 5: Know when PNG vs JPG really matters
Both formats can work, but they tend to fail in different ways. PNG is usually better for sharp edges, illustrated AI art, and graphic-style artwork. JPG is usually acceptable for painterly images, photographic AI images, and files that already look clean and detailed.
Step 6: Decide whether AI upscaling will help
Not every AI image starts at the ideal size for the exact product you want. That does not automatically mean the file is unusable. AI upscaling can often help make a file more suitable for print by increasing usable size and improving perceived detail.
- It helps most when the composition is already strong and the file is only slightly too small.
- It does not fully fix severe blur, anatomy problems, or major artifacts.
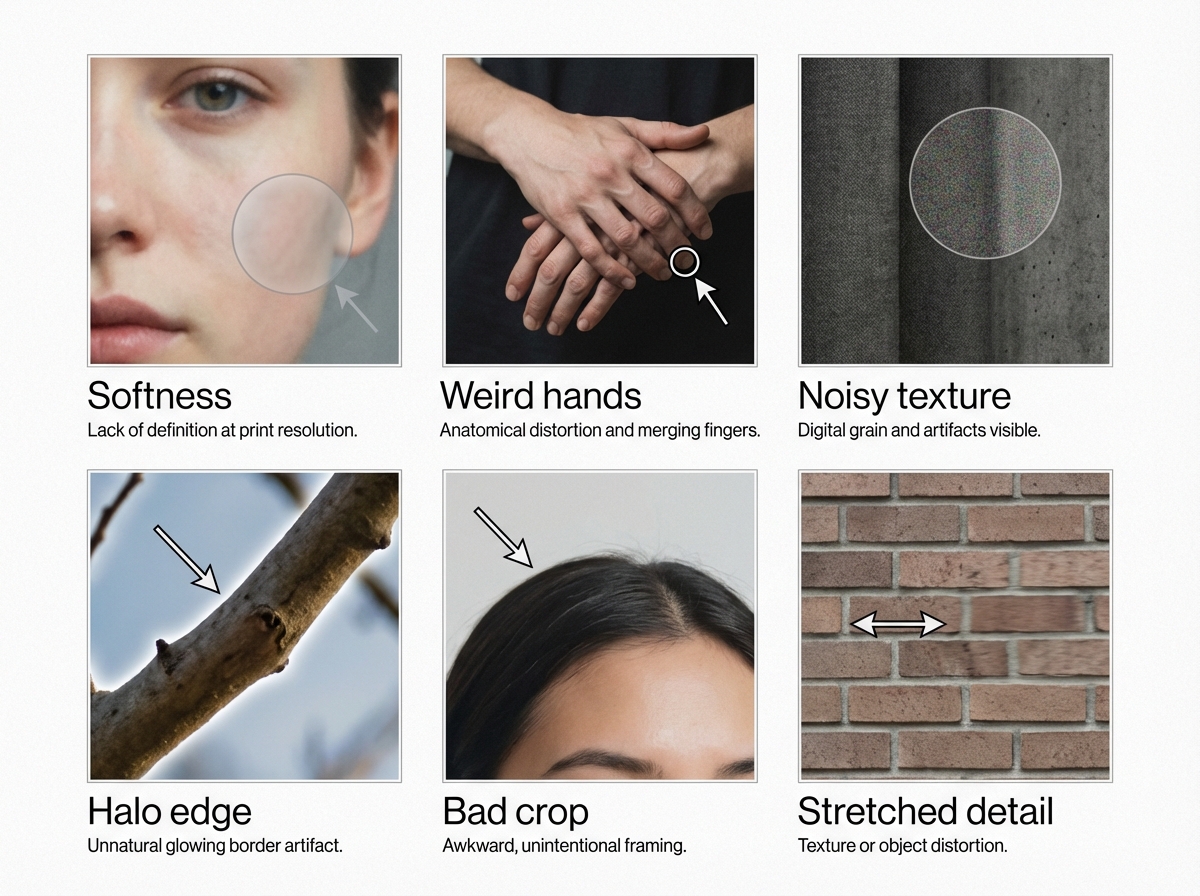
Step 7: Check for common AI image problems before printing
An image can look impressive at feed size and still reveal problems when you inspect it for print. Look closely for softness, weird hands, texture noise, artifact patterns, halo edges, cropping issues, and stretched details.
Step 8: Prepare for the product shape, not just the image
A forgiving first project. Check whether the main subject works in a horizontal wrap area.Explore ceramic mugs
Need a wider image with enough clean detail across the frame.See the desk mat
Work best with images that stay interesting across many pieces.View the puzzle option
- Is the image exported at full size?
- Are you using PNG or high-quality JPG appropriately?
- Do the pixel dimensions make sense for the product?
- Is the crop right for the item you want?
- Are the main details sharp enough?
- Did you check for weird hands, noisy textures, or edge artifacts?
- If the image feels slightly small, would upscaling help?
- Does the image still look clean when zoomed in?
A good-looking screen image is not always print-ready, but it is often fixable
That is the main misconception to correct. Screen-ready and print-ready are not the same thing. But the opposite assumption is also wrong: a source image that is a bit small, soft, or imperfect is not automatically unusable.
The more useful question is not “Is this file perfect?” It is “Can this image be prepared well enough for the product I want?” Very often, the answer is yes.
Ready to turn your AI image into a print?
If you already have an image you like, the next step is simple: upload it and choose the product that fits it best.
FAQ
What is the best file type for printing AI images?
PNG is usually the safest option because it preserves detail well and avoids added compression. A high-quality JPG can also work, especially for painterly or photo-style AI images, but lower-quality JPG compression can hurt print results.
Can a small AI image still be printed?
Often, yes. A smaller file is not automatically unusable. The result depends on the product size, the original image quality, and whether upscaling can improve the file enough for print.
Is 300 DPI enough for AI art printing?
300 DPI is a common print reference point, but the more important issue is whether the image has enough real pixel dimensions for the final print size.
How do I know if my AI image is print-ready?
Check the file type, pixel dimensions, crop, and visible quality. If the image still looks clean when reviewed larger and fits the intended product shape, it is likely close to print-ready.